-
Sale!
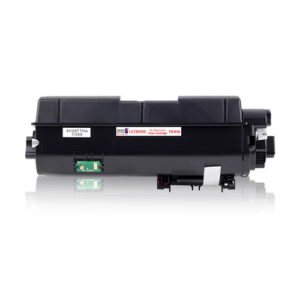
Flowjet-22 SP100 Black Toner Cartridge Compatible with Ricoh Printers SP-100SU, SP-100SF
3,650.00 Original price was: 3,650.00. 1,149.00Current price is: 1,149.00.
-
Sale!
Flowjet-6-48QOBG WiFi Colour Printer – Print/Scan/Copy Ideal for Home
6,833.00 Original price was: 6,833.00. 5,499.00Current price is: 5,499.00.
-
Sale!
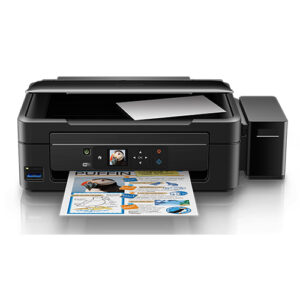
Flowjet-5-Z6ACUI Efficient Color Printer All in One (Print, Scan, Copy) WiFi Ink for Home
4,900.00 Original price was: 4,900.00. 4,499.00Current price is: 4,499.00.
-
Sale!
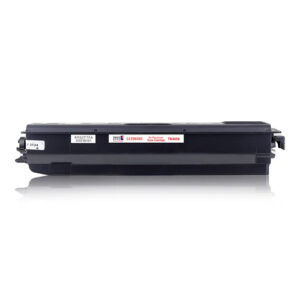
Flowjet-23 152A Black Toner Cartridge Compatible with HP W1520
4,500.00 Original price was: 4,500.00. 2,149.00Current price is: 2,149.00.
-
Sale!
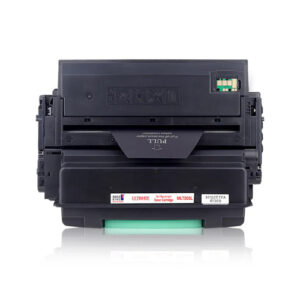
Flowjet-21 210KEV Black Toner Cartridge Compatible with PANTUM P2200
3,550.00 Original price was: 3,550.00. 1,049.00Current price is: 1,049.00.
-
Sale!
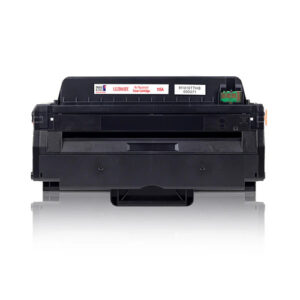
Flowjet-20 303 Black Toner Cartridge Compatible with Canon CRG30
2,550.00 Original price was: 2,550.00. 849.00Current price is: 849.00.
-
Sale!

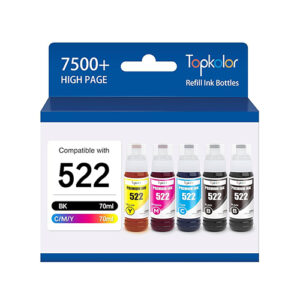
Flowjet-19 GT52, 53 Set of 4 bottle (410, 415, 419, 210, 500, 515)
2,750.00 Original price was: 2,750.00. 2,230.00Current price is: 2,230.00.
-
Sale!

Flowjet-18 GT53 Black Ink Bottle, 90ml
770.00 Original price was: 770.00. 416.00Current price is: 416.00.
-
Sale!
Flowjet-17 GI-790 Bottle, Set of 4 (G1000, G1010, G2000, G2002)
2,544.00 Original price was: 2,544.00. 2,099.00Current price is: 2,099.00.
-
Sale!
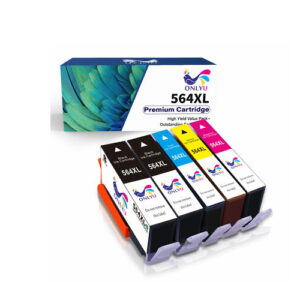
Flowjet-16 Refillable Ink Tank PGI725 Black CLI726 Black Magenta Cyan Yellow Set of 5
2,250.00 Original price was: 2,250.00. 1,620.00Current price is: 1,620.00.
-
Sale!
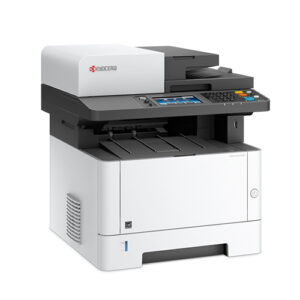
Flowjet-1-OQQF7Y Automatic Duplex Laser Printer, Multi-function, LCD Display, 32 MB Memory, USB
22,365.00 Original price was: 22,365.00. 16,299.00Current price is: 16,299.00.
-
Sale!
Flowjet-2-V592AK All-in-One Printer, Print, Copy, Scan, Hi-Speed USB 2.0, Up to 7.5/5.5 ppm (Black/Color)
4,589.00 Original price was: 4,589.00. 4,199.00Current price is: 4,199.00.
HP Printer Setup – Complete Step-by-Step Guide
1. Unbox the Printer
Carefully remove everything from the box:
- Printer unit
- Power cable
- Ink cartridges or toner
- Setup guide/manual
- USB cable (some models)
Remove all:
- Protective tapes
- Plastic covers
- Packing materials (inside and outside)
2. Connect Power and Turn On
- Plug the power cable into the printer.
- Connect it to a wall outlet.
- Press the Power button to turn it on.
Wait for the printer to initialize (you may hear some noise).
3. Set Basic Preferences
On the printer control panel (if available):
- Select language
- Set country/region
- Set date and time
4. Install Ink Cartridges / Toner
- Open the cartridge access door.
- Take cartridges out of packaging.
- Remove protective tape (don’t touch the copper contacts).
- Insert cartridges into their respective slots:
- Black → Black slot
- Color → Color slot
- Push until they click into place.
- Close the access door.
5. Load Paper
- Pull out the paper tray.
- Adjust paper guides.
- Load A4 sheets properly.
- Slide guides so they fit snugly.
6. Install Printer Software (Important)
Option A: Using HP Smart App (Recommended)
- Download the app:
- On phone: Install HP Smart from Play Store/App Store
- On computer: Go to HP Smart
- Open the app and click “Add Printer”.
Option B: From HP Website
- Visit **HP Inc. official website
- Search your printer model
- Download drivers and install
7. Connect Printer to Wi-Fi (Wireless Setup)
Method 1: Using HP Smart App
- Open HP Smart
- Tap Add Printer
- Select your printer
- Enter your Wi-Fi password
- Wait until it connects
Method 2: Using Printer Control Panel
- Go to Wireless Settings
- Select Wi-Fi Setup Wizard
- Choose your network
- Enter password
- Confirm connection
Method 3: WPS (If Supported)
- Press WPS button on router
- Press WPS button on printer
- Wait for automatic connection
8. Connect via USB (Alternative)
If you don’t want Wi-Fi:
- Plug USB cable into printer and computer
- Install drivers (automatic or manual)
- Printer will be detected
9. Align and Calibrate Printer
After installing cartridges:
- Printer may automatically print an alignment page
- Follow on-screen instructions to complete alignment
This ensures better print quality.
10. Print a Test Page
From HP Smart or system settings:
Check:
- Ink quality
- Alignment
- Colors
11. Start Printing
Now your printer is ready. You can:
- Print documents
- Scan files
- Copy pages
Troubleshooting Tips
Printer not detected
- Ensure Wi-Fi is ON
- Restart printer and router
- Reopen HP Smart
Poor print quality
- Run head cleaning from settings
- Check ink levels
Offline issue
- Set printer as default printer
- Restart spooler service (on PC)
123 HP Printer Setup (Full Guide)
1. Choose the Right Placement First
- Keep the printer on a flat, stable surface.
- Place it within Wi-Fi range (avoid thick walls).
- Leave space around it for ventilation and paper movement.
2. Use the Control Panel for Initial Setup
- When you power on, many HP printers show:
- Language selection
- Region selection
- Set these correctly—this affects ink compatibility and updates.
3. Let the Printer Perform Initial Ink Charging
- After installing cartridges, the printer may take 5–10 minutes to initialize ink.
- Do NOT turn it off during this stage—it can cause ink system errors.
4. Reset Wireless Settings (If Needed)
If the printer was used before:
- Go to Wireless Settings → Restore Network Settings
- This clears old Wi-Fi connections before fresh setup.
5. Use HP Smart Instead of Manual Drivers
Instead of downloading manually:
- Install HP Smart on PC or phone
- It:
- Detects printer automatically
- Installs drivers
- Guides setup step-by-step
👉 This is the easiest method for beginners.
6. Keep Device and Printer on Same Network
- Ensure your:
- Laptop/phone
- Printer
are connected to the same Wi-Fi network
- Otherwise, the printer won’t appear during setup.
7. Use “Wireless Test Report”
- Print a Wireless Test Report from printer settings.
- It shows:
- Signal strength
- Connection status
- Errors (if any)
8. Update Firmware Immediately
- Open HP Smart or printer settings
- Check for firmware updates
- Updates fix:
- Connectivity issues
- Cartridge recognition problems
9. Set Default Print Preferences
After installation:
- Go to printer settings on your PC
- Set:
- Paper size (A4 for India)
- Print quality (Draft/Normal/Best)
- Black & white default (to save ink)
10. Enable Wireless Direct (Optional)
- Turn on Wi-Fi Direct from printer settings
- This allows:
- Direct printing without router
- Useful during Wi-Fi issues
11. Check Ink System Status
- Use printer menu or HP Smart to:
- Check ink levels
- Run diagnostic tools
- Avoid printing when ink is too low—it can damage printhead.
12. Register Your Printer
- Create/log in to HP account
- Register your printer for:
Smart Troubleshooting Tips
- Blinking blue light → Wi-Fi not connected
- Printer not detected → Use USB once, then switch to Wi-Fi
- Slow printing → Lower print quality or update driver
- Frequent disconnection → Move printer closer to router
Brother Printer Setup – Step-by-Step Guide
1. Understand the Model Type First
Brother printers vary more by category than HP:
- InkBenefit / Ink Tank (DCP-T, MFC-T series) → refillable ink tanks
- Laser (HL, DCP-L, MFC-L series) → toner-based, faster printing
👉 Setup differs slightly depending on this, especially ink vs toner.
2. Install Toner or Fill Ink (Model-Specific)
🔹 For Laser Printers (Toner Setup)
- Open front cover
- Remove drum unit + toner cartridge
- Gently shake the toner (for even distribution)
- Insert back into printer
⚠️ Important: Brother uses a drum + toner system (separate parts), unlike HP’s combined cartridges.
🔹 For Ink Tank Models
- Open ink tank caps
- Insert ink bottles into correct color slots
- Let ink flow automatically (no squeezing)
- Close caps after filling
💡 Brother ink tanks often auto-stop filling—don’t force extra ink.
3. Initial Internal Charging (Very Important)
After installing ink/toner:
- Printer may take 5–15 minutes to initialize
- Ink tank models will prime the ink system
👉 Do NOT turn off during this stage, or it may cause air block issues.
4. Use the Brother iPrint&Scan App
Instead of HP Smart, Brother uses:
Why this matters:
- Faster detection for Brother devices
- Built-in scanning + document editing
- Better for mobile printing than manual setup
5. Wireless Setup via “Setup Wizard” (Brother Style)
Brother printers usually don’t auto-broadcast like HP. You’ll need:
- Press Menu button
- Go to:
- Network → WLAN → Setup Wizard
- Select your Wi-Fi
- Enter password using keypad
💡 Tip: Navigation buttons (▲ ▼ OK) are commonly used instead of touchscreens.
6. Alternative: Wi-Fi Direct (No Router Needed)
Brother supports strong Wi-Fi Direct mode:
- Enable Wi-Fi Direct on printer
- Connect phone/laptop to printer’s network
- Use Brother iPrint&Scan to print
👉 Useful for:
- No internet environments
- Travel or temporary setups
7. Install Full Driver Package (Recommended for PC)
Brother provides a complete driver suite, not just basic drivers.
- Download from Brother Industries official site
- Install:
- Printer driver
- Scanner driver
- ControlCenter software
💡 This unlocks:
- Advanced scanning
- Fax settings (for MFC models)
- Maintenance tools
8. Paper Handling Configuration (Brother-Specific Strength)
Brother printers give more control over paper:
- Set paper type (Plain, Inkjet, Glossy)
- Set paper size (A4, Legal, Letter)
- Adjust tray priority
👉 This reduces:
- Paper jams
- Smudging
- Wrong print scaling
9. Manual Print Quality Adjustment
Brother doesn’t auto-optimize as aggressively as HP.
Go to:
- Printer settings → Print Quality
Options include:
- Draft (fast)
- Normal
- High quality
💡 You can also manually clean print heads from settings.
10. Firmware & Maintenance Mode
Brother printers include a hidden maintenance system:
- Firmware updates via PC or app
- Error codes displayed clearly (e.g., “Unable to Print 0A”)
👉 These codes are useful for troubleshooting—Brother is more transparent than HP here.
Common Brother-Specific Issues
❌ “Offline” even when connected
- Disable Sleep Mode
- Reconnect via iPrint&Scan
❌ Toner not recognized
- Remove and reinstall cartridge
- Reset toner counter (model-specific)
❌ Lines in prints (Ink Tank models)
- Run Ink Flush / Head Cleaning
- Ensure no air bubbles in tubes
Practical Tips (Brother Users)
Keep firmware updated for network stability
Laser models are better for bulk printing
Ink tank models are best for low-cost color printing
Always use original Brother ink/toner for longevity
Epson Printer Setup (Step-by-Step)
1. Unbox the Printer
- Remove the printer from the box.
- Take off all tapes, plastic covers, and protective materials.
- Open the scanner lid and remove internal packaging.
2. Fill Ink Tanks / Install Cartridges
For EcoTank Models:
- Open the ink tank cover.
- Carefully fill each tank with the correct ink color (no squeezing needed).
- Close caps securely.
For Cartridge Models:
- Turn on the printer.
- Open the cartridge access door.
- Insert cartridges into the correct slots.
- Press until they click.
3. Load Paper
- Pull out the paper tray.
- Insert A4 sheets.
- Adjust paper guides so paper fits snugly.
4. Turn On the Printer
- Plug the printer into a power source.
- Press the Power button.
- Wait for initialization.
5. Connect the Printer
Option A: 📶 Wi-Fi Setup (Recommended)
- On the printer panel:
- Go to Home → Wi-Fi Setup / Network Settings
- Select your Wi-Fi network.
- Enter the password.
- Wait until it shows Connected.
👉 Alternate (WPS method):
- Press WPS button on router.
- Press Wi-Fi button on printer.
Option B: 🔌 USB Setup
- Connect printer to computer using USB cable.
- Drivers may install automatically.
6. Install Printer Drivers & Software
- Visit the official Epson setup page:
- Enter your printer model.
- Download and install drivers.
- Follow on-screen setup instructions.
7. Add Printer to Computer
On Windows:
- Go to Settings → Printers & Scanners
- Click Add a Printer
- Select your Epson printer
On Mac:
- Go to System Settings → Printers & Scanners
- Click + (Add Printer)
- Select your printer
8. Print a Test Page
- Open any file.
- Click Print.
- Select your Epson printer.
- Print to confirm setup.
9. Mobile Printing Setup (Optional)
Use:
Steps:
- Install the app on your phone.
- Connect phone to same Wi-Fi.
- Add your printer inside the app.
10. Initial Maintenance (Important)
- Run Print Head Alignment
- Run Nozzle Check
- Perform Head Cleaning if needed
These options are in printer settings.
Common Problems & Fixes
- Printer not connecting to Wi-Fi → Restart router & printer
- Blank or faded prints → Run head cleaning
- Printer offline → Re-add printer or reinstall drivers
Canon Printer Setup Guide (Step-by-Step)
1. Unbox and Prepare the Printer
- Remove the printer from the box.
- Take off all protective tapes, plastic, and packaging materials.
- Open the scanner lid and remove any internal packing.
2. Install Ink Cartridges
- Turn on the printer using the power button.
- Open the ink cartridge access door.
- Insert the cartridges into their correct slots (color & black).
- Push until they click into place.
- Close the lid.
3. Load Paper
- Pull out the paper tray.
- Insert A4 or Letter-size paper.
- Adjust paper guides to fit properly.
4. Power On the Printer
- Plug the printer into a power outlet.
- Press the Power button.
- Wait for it to initialize (this may take a minute).
5. Connect the Printer
Option A: 📶 Wi-Fi Setup (Recommended)
- On the printer screen, go to:
- Settings / Setup → Wireless LAN Setup
- Select your Wi-Fi network.
- Enter your Wi-Fi password.
- Wait until it shows Connected.
👉 Some models use a WPS button:
- Press WPS on your router.
- Press Wi-Fi button on printer.
Option B: 🔌 USB Cable Setup
- Connect the printer to your computer using a USB cable.
- The system may automatically detect and install drivers.
6. Install Drivers & Software
On Windows / Mac:
- Go to the official Canon support site:
- Enter your printer model.
- Download and install the driver/software.
- Follow on-screen instructions.
7. Add Printer to Your Device
On Windows:
- Go to Settings → Devices → Printers & Scanners
- Click Add a Printer
- Select your Canon printer
On Mac:
- Go to System Settings → Printers & Scanners
- Click + (Add Printer)
- Select your printer
8. Print a Test Page
- Open any document.
- Click Print.
- Select your Canon printer.
- Print a test page to confirm everything works.
9. Install Mobile Printing (Optional)
You can print from your phone using:
- Canon PRINT Inkjet/SELPHY (Android/iOS)
Steps:
- Install the app.
- Connect to the same Wi-Fi network.
- Add your printer in the app.
10. Final Checks
- Ensure printer shows Online/Ready
- Check ink levels
- Align print head if needed (from settings)
Common Issues & Fixes
- Printer not found? → Restart Wi-Fi and printer
- Poor print quality? → Run cleaning/alignment
- Offline status? → Reconnect or reinstall drivers
Brother Printer Setup – Step-by-Step Guide
1. Understand the Model Type First
Brother printers vary more by category than HP:
- InkBenefit / Ink Tank (DCP-T, MFC-T series) → refillable ink tanks
- Laser (HL, DCP-L, MFC-L series) → toner-based, faster printing
👉 Setup differs slightly depending on this, especially ink vs toner.
2. Install Toner or Fill Ink (Model-Specific)
🔹 For Laser Printers (Toner Setup)
- Open front cover
- Remove drum unit + toner cartridge
- Gently shake the toner (for even distribution)
- Insert back into printer
⚠️ Important: Brother uses a drum + toner system (separate parts), unlike HP’s combined cartridges.
🔹 For Ink Tank Models
- Open ink tank caps
- Insert ink bottles into correct color slots
- Let ink flow automatically (no squeezing)
- Close caps after filling
💡 Brother ink tanks often auto-stop filling—don’t force extra ink.
3. Initial Internal Charging (Very Important)
After installing ink/toner:
- Printer may take 5–15 minutes to initialize
- Ink tank models will prime the ink system
👉 Do NOT turn off during this stage, or it may cause air block issues.
4. Use the Brother iPrint&Scan App
Instead of HP Smart, Brother uses:
Why this matters:
- Faster detection for Brother devices
- Built-in scanning + document editing
- Better for mobile printing than manual setup
5. Wireless Setup via “Setup Wizard” (Brother Style)
Brother printers usually don’t auto-broadcast like HP. You’ll need:
- Press Menu button
- Go to:
- Network → WLAN → Setup Wizard
- Select your Wi-Fi
- Enter password using keypad
💡 Tip: Navigation buttons (▲ ▼ OK) are commonly used instead of touchscreens.
6. Alternative: Wi-Fi Direct (No Router Needed)
Brother supports strong Wi-Fi Direct mode:
- Enable Wi-Fi Direct on printer
- Connect phone/laptop to printer’s network
- Use Brother iPrint&Scan to print
👉 Useful for:
- No internet environments
- Travel or temporary setups
7. Install Full Driver Package (Recommended for PC)
Brother provides a complete driver suite, not just basic drivers.
- Download from Brother Industries official site
- Install:
- Printer driver
- Scanner driver
- ControlCenter software
💡 This unlocks:
- Advanced scanning
- Fax settings (for MFC models)
- Maintenance tools
8. Paper Handling Configuration (Brother-Specific Strength)
Brother printers give more control over paper:
- Set paper type (Plain, Inkjet, Glossy)
- Set paper size (A4, Legal, Letter)
- Adjust tray priority
👉 This reduces:
- Paper jams
- Smudging
- Wrong print scaling
9. Manual Print Quality Adjustment
Brother doesn’t auto-optimize as aggressively as HP.
Go to:
- Printer settings → Print Quality
Options include:
- Draft (fast)
- Normal
- High quality
💡 You can also manually clean print heads from settings.
10. Firmware & Maintenance Mode
Brother printers include a hidden maintenance system:
- Firmware updates via PC or app
- Error codes displayed clearly (e.g., “Unable to Print 0A”)
👉 These codes are useful for troubleshooting—Brother is more transparent than HP here.
Common Brother-Specific Issues
❌ “Offline” even when connected
- Disable Sleep Mode
- Reconnect via iPrint&Scan
❌ Toner not recognized
- Remove and reinstall cartridge
- Reset toner counter (model-specific)
❌ Lines in prints (Ink Tank models)
- Run Ink Flush / Head Cleaning
- Ensure no air bubbles in tubes
Practical Tips (Brother Users)
- Laser models are better for bulk printing
- Ink tank models are best for low-cost color printing
- Always use original Brother ink/toner for longevity
- Keep firmware updated for network stability